Click covers for info. Copyright (C) Rudy Rucker 2021.


Archive for the ‘Rudy’s Blog’ Category

The Hollow Earth Ebook

Monday, January 17th, 2011

My novel The Hollow Earth is now available as an ebook in Kindle format, with other formats to come.

I made up a new cover for the book, based on a painting of mine. The text is drawn from the excellent Monkeybrain Books edition of 2006, which had a great cover by John Picacio. The book has sold well, but some paperbacks are still available. You can also find links for that on my new page for The Hollow Earth .

I had some fun figuring out how to make an ebook edition I can read on my iPhone (using the free Kindle app). Lots of crashing through the web’s thickets.

Why an ebook release?

This weekend I was talking to my friend Rick Kleffel about my motivation for getting my books all online as e-books. And I had the insight that I do this to make my work more lasting. It requires steady vigilance and effort to keep one’s books in print. Only a tiny fraction of books remain in print for more than a year or two after the author’s death.

If your book is online, you’ve got a much better shot at reading readers twenty or a hundred years from now. If your online book is into the ebook stream, then publishers can continue distributing it and porting it to new platforms and file formats across the world for many years to come. Like Peter Bruegel’s “The Beekeepers,” shown above. And here is Mason Algiers Reynolds’s sketch of the Hollow Earth, allegedly discovered in the UC Berkeley library.

In an earlier post, “Writing the Hollow Earth,” I describe how I came to write the novel. And Mike Perschon has posted a 2009 interview with me about The Hollow Earth on his blog, Steampunk Scholar.

Enjoy! And leave your comments below.

Ripping Vinyl to MP3s for iTunes.

Thursday, January 13th, 2011

I link to this page from a new post on February 18, 2014. And I revised this page here, as well.

This post goes with another post called, Managing Music in iTunes.

My goal is to document how I got about ripping my old vinyl records into mp3 files that I can run through iTunes to get them onto my iPhone for playing the car and through my stereo, etc. It’s been two years since I did this, and I’m glad I documented the process at that time, as this kind of info has a very short half-life, that is, I forget the tedeious details. So now, in 2014, I’m tacking another what at my vinyl lode, and I’m updating this info.

And I link into these two info pages from a

By the way, the first album I ripped, back in 2012, was the first one I ever bought, Go Bo Diddley, purchased fifty years ago when I was 14. “Crackin’ Up.” [Apparently people can post copyrighted songs on YouTube because the users don’t get to keep the song, they only get to listen to it stream from the site.]

Don’t you think this dino looks like a triumpant Joey Ramone? He learned how to rip his vinyl, which is shy he’s so glad. You might select the following text block and have your browser do a Print | Selection for a handy sheet-of-paper guide for your ordeal.

(1) You can use a regular (non-USB) turntable, but it’s advisable to have a little pre-amp box about the size of a pack of cigarettes. The turntable sends two plugs into the pre-amp, and you run two lines out of the pre-amp. You need a two-to-one connector to hook the pre-amp to your computer. This looks like a single jack, but it is in fact carrying sterio. This 2-to-1 connector wire can be the same one that you might use to plug your one-socket iPod or iPhone into the two stereo input jacks of a living-room sound-system amplifier, although when you do that, you’re using the connector the “other way around.”

(2) You use the two-to-one connector to run from the pre-amp into the “Line In” jack that you can find on the exposed back of your sound card on the back of your desktop computer. Most laptops don’t have a Line In jack. You don’t want to use a “Microphone” jack, as that won’t pass the stereo through.

(3) You get the free software Audacity for Windows , Linux or Mac. You fire up Audacity and set the Speakers selector in the menu bar just to Speakers (this is just for monitoring), and you set the Microphone selector to “Line In.” SEt the right most selector to “2 Stereo Input Channels.” Click on the round button to start recording. A moment later, put your needle onto your turntable and let your record play. You can see the wiggles of the sound on the Audacity screen, and you can set the computer to pass the Line In sound out to your computer speakers to monitor waht’s going on. This always takes me awhile and I always forget how I did it. But now I just figured it out yet again, so I’ll write it down. I’m using Windows 7 (and I can’t help you with the Mac OS0. I go to the Windows Control Panel, open the Sound dialog, go to the Recording sheet, right click on Line In, click on Properties, go to the Listen sheet, and click Listen To This Device. Simple, huh? See the Audacity turorial files for help on recording a record on your computer.

(4) Tape both sides of the record into a single file, probably using separate tracks for side on and side two. The different tracks are different horizontal graphs of squiggles. Check the Audacity tutorial about setting the sound level, basically you slide the “microphone” slider in the upper right until the dancing horizontal sound bars are almost but not quite hitting the right ends of the indicators. If you stop and start and make several tracks in your Audacity screen, it’s okay as later when you export, it’ll handle them all. But be sure to make a new track start at the time point where the previous one stops, otherwise you’ll end up hear two tracks at once. You can use Tracks | Alight Tracks | End to End to line up the tracks. ( You might want to do Ctrl+A to select all and run the Effect | Click Removal and maybe Effect | Normalize to clean up your track. YOu can even screw around with Noise Removal and Equalize, but I tend not to run any of the filters, as I don’t really know what I’m doing, and I worry about degrading the original vinyl sound.) Now to save as separate songs. You have to show Audacity where the breaks between songs are, see the Audacity help on this. The easiest way to do this is by hand, inserting labels. There’s an automatic Analyze | Find Silences control you can use, but it doesn’t work very well because vinyl really never is silent anywhere. So I put the labels in my hand, sometimes looking at the song list on the album to make sure I get the right count. I don’t bother putting song names in the labels, just leave them blank, Audadicty can put in numbers for the labels when you save, which keeps them in the right track order. You save the recording into separate files, one for each song. You can use the “Export Multiple…” command, sending the files into a reasonable directory like Music\Bo Diddley\Go Bo Diddley, as numbered files. To give the files reasonable automatic names, check the “add number after file name prefix” and type in a prefix name like rollingstone_letitbleed. And tell Audacity not to ask you about each song, set Edit |Preferences | Import/Export to turn off “Show Metadata Editor prior to each step.” Typically you save the filesin a fairly high quality MP3 format, using the File | Export (as MP3) | Options dialog to use a Variagle bitrate with a target quality of maybe level 5. You can look at file sizes and listen to them to decide. Don’t close your Audacity project file until you’re sure that everything exported properly and is in good shape, and properly trimmed. Or seave the project in a temporary file. You can re-edit and re-export a project as mp3 with no loss in quality. You don’t normally want to SAVE the project file longterm as it’s huge. And you don’t want to re-open and re-edit and re-export an MP3 as every pass through this cycle degrades quality.

(5) Open your newly created directory of (still unnamed) mp3 files with (if you’re a Windows user) the tool mp3tag. Highlight all your tracks and make sure they’re sorted from low track number to high track number (by default it’s often the other way around…you change the sorting by clicking on the “name” heading in the browser). Now you can use the album name to get mp3tag to look up and install the track name metatags for you. There’s various places to search, sometimes you need to try more than one of them. Mp3tag offers several options under the Tag Sources menu item. Don’t try and mess with the freedb option…in my experience it is essentially impossible to get the settings right for freedb. Instead use the MusicBrainz option which is in fact a front end for the freedb data base in any case. Or use the Amazon options. When you find the right list, mp3tag can copy the web data into your track title metatags. And then you can get it to copy the track titles onto the file names. One issue here is that if you skipped some tracks of your album, then your track list won’t match what’s ont he album. The mp3tag program throws up a dialog that lets you adjust the track matches, moving your tracks up and down in play order. I don’t know what the best free Mac tool like mp3tag is, you can find a list of some apparently free options on Softonic, although many “free” wares later turn out not to be. By the way, it doesn’t work very well to import your tracks into iTunes and then ask iTunes to find the track titles for you, as iTunestends to only want to help you with tracks that you bought from theiStore.

(6) Use the File | Add Folder to Library… selection in iTunes to bring your new files into iTunes. You can find a nice album cover with a quick Google image search and paste it into place.

(7) Of course getting control of your iTunes music storage is a whole other (large) issue. I have a page on this topic as well, see my post called, Managing Music in iTunes for Free. The most important step is that you need to use your own directory structure for the music and not let iTunes “manage” the music…which would mean hiding it off in a zillion folders with meaningless encrypted names. But, as a I say, that’s a whole other issue, and I get into it in that other post.

And now…wah-wah-wah of timewarp…this post segues from the 2014 update back to the original post of 2011.

Upcoming event: I’ll be reading “The Birth of Transrealism,” a section from my forthcoming memoir, Nested Scrolls , at 7 PM this Saturday night, January 15, 2011, in San Francisco at the SF in SF gathering in the Hobart Building on Market St. near Montgomery St. and 3rd St. Diana Paxson will be reading as well.

My writing is moving slowly this month. It’s taking some time to ramp back up after the Xmas break. Also I pissed away days and days tweaking my music collection on my computer for my new iPhone, and coming to terms with the obtuse and balky iTunes music management software. And blogging about it, God help me. As an on-going part of the process, I’m “ripping” some vinyl records to files. Converting analog to digital, which is, of course, a good analogue for my lifebox-and-Ware-Tetralogy Digital Immortality kick. I have a brief guide to ripping vinyl at the end of this post.

One cool thing about my novel-in-progress, Turing & Burroughs is that it shows Alan moving against the tide, that is, he’s going from digital computers to analog biocomputations. But the more relevant thing is that it shows something computational (the skugly biocomputation) becoming symbiotic with human life (like people carrying smart phones).

I remain unsure about the over-all plot, which is hanging me up. When I’m lost sat sea in the middle of a book, I fall back on what we used to call “paper-shuffling.” That is, I play with organizational matters. Tidy things up. It’s like—when I lose my wallet, glasses or keys, I can often find them by cleaning up my whole office.

I’ve also been firming up my ever-evolving conceptions about the skugs and their origins, and this involves revisions. It seems a bit much to suppose that the skugs have really strong personalities, as they’re just AI-tweaked networks of biocomputations. I need to keep reminding myself that they’re not alien invaders. This said, I do have the possibility of giving the skugs a hive-mind personality that’s to some extent based on what they pick up over radio and TV signals. This could be a correlative for, e.g., the hive minds you see if you study Twitter or Facebook or Google search results.

Looking ahead, I had been planning to add in a higher level of reality populated by dreamskugs, effectively a second race of odd critters. But yesterday in the car, driving up to Berkeley with my wife, I was telling her about my plans for the book. And when I got to the dreamskugs, she was like, “What!? Don’t do that again, Rudy! One kind of creature is enough. Don’t always overdo it.” And she’s right.

It boggles the mind to think about how many kinds of critters I jammed into each of my last three novels, that is, Postsingular, Hylozoic, and Jim and the Flims. It’s okay and maybe even good that I packed those books with alien eyeball kicks, but it’s a baroque high-SF supercartoon style that I’d like to get away from for Turing & Burroughs. I’d like to see novel one be a more stripped-down. Like a 1950s black and white SF invasion movie. Like Them or the originals of The Fly or The Invasion Of The Bodysnatchers.

But way of opening up my mind to a new conception fo the novel, I moved the second half of my former outline into a new “False Paths” section of my notes for the novel. As I discuss in my free “A Writer’s Toolkit” on my writing page, having this kind of data repository means that I feel less constrained in making brutal cuts and changes to the old outline (or to the text). And thus, today I managed to rewrite my working outline, which is something I’ve been wanting to do for a month. It’s the kind of job that only takes an hour or two when you do it—but getting your head in the right place for the job can take weeks or months.

See some of you Sat nite, I hope.

Digital Immortality Again

Sunday, January 9th, 2011

So, cool, I got a passing mention in the Sunday New York Times Magazine today in an article by Rob Walker, “Cyberspace When You’re Dead,” about various kinds of digital immortality.


[The illos in today’s post, for reasons which will become clear, are my photos used to illustrate a story by Mac Tonnies, “One Hundred Years” which appeared in issue #3 of my online zine, Flurb. Some of the photos are from other stories in the same issue #3. By the way, I’d love to know the name of the artist who painted the wonderful street mural shown above.]

As regular readers will know, I’ve written about themes of software immortality in several contexts. To start with, the four novels in my Ware Tetralogy deal with the notion of copying someone’s mind to another platform. The collection is available in print, as a commercial ebook, and as a free CC ebook.

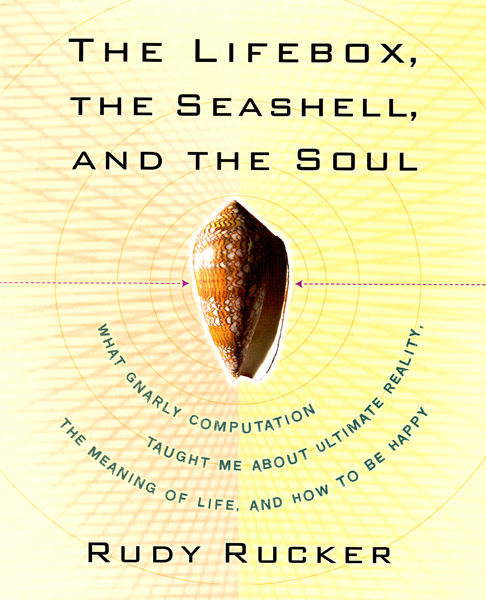
I coined the word “lifebox” in a short story, “Soft Death,” which appeared in The Magazine of Fantasy and Science Fiction in September, 1986. I used it to mean a digital or online simulacrum of a person. I go into considerable detail about the lifebox in my novel, Saucer Wisdom, in my non-fiction book, The Lifebox, the Seashell, and the Soul, and in my 2009 article “Lifebox Immortality” which I co-authored with Leon Marvell. This article has also appeared in a recent issue of h+ magazine.

In a nutshell, my idea is this: to create a virtual self, all I need to do is to (1) Place a very large amount of text online in the form of articles, books, and blog posts, (2) Provide a search box for accessing this data base, and (3) Provide a nice user interface.

I made a first crude stab at this a month ago, with my Rudy’s Lifebox page. This page lets you Google-search my rather large www.rudyrucker.com site.

The “test subject zero” discussed in today’s Times magazine article is Mac Tonnies, who died this year. I was one of Mac’s numerous online friends—you can find the exact extent of this by typing “Mac Tonnies” into the Search box on the Rudy’s Lifebox page mentioned above. Most of the hits are to posts which have comments by Mac at the bottom. And, as mentioned in the caption to first illo on today’s post, I published one of Mac’s stories in my webzine.

As the Times article discusses, some friends of Mac’s have kept his Posthuman Blues blog alive as a kind of lifebox. Note the slightly ominous final post, although Mac liked these kinds of images, so really they aren’t all that ominous in the context of his blog.

The Times article is a harbinger of a trend I’ve been predicting for some time: there’s going to be a small industry based on people building digital memory-shrines for themselves. The Nokia phone company had an early entry into this sweepstakes with their Lifeblog package, but that’s gone now, so far as I know. More recently, I noticed that Hallmark Cards is getting into “memory-keeping products.” And everyone’s heard of Microsoft’s Gordon Bell and his MyLifeBits project.

Some of the links in the Times article are for companies like Entrustet that serve as digital repositories for your “lifebox” data such as online photos or collections of your writings. At this point, some of these services are primarily about cloud-based data-storage, with an immortality spin. These services are expensive, though, and often involve a monthly fee—which you’re likely to stop paying a few years before you die. If you’re interested in pursuing a lifebox plan of your own, here’s a 2016 overview by a group called Cloudwards, comparing the various cloud-based storage services such as Carbonite.

Another company, Deathswitch, will send post-mortem messages to people from you! How do they know when to send the messages? When you stop answering their emails and/or, presumably, when paying the bills they send you. It’s easy to imagine some tragicomic scenarios here—a guy writes angry “Aren’t you sorry now” messages, forgets about it, lets the account lapse. Actually, the idea for the company is grounded on a short-short story “A Brief History of Death Switches” by the company founder David Eagleman.

Back to digital immortality. One way to create a lifebox is, like Gordon Bell, just to save everything you type and photograph everything you see. Another way is to become a writer and to craft a memoir. People in search of shortcuts will turn to companies who purport to help them. A couple of links from entrants into this sweepstakes: LifeNaut and Virtual Eternity. This exercise quickly turns kind of creepy, veering into the Uncanny Valley.

Clearly what’s needed is some solid shareware to layer onto something resembling Google Search. I wrote a little about this in my post on “Chatbots,” and in the comments on the post.

Actually, as the years go by, this whole enterprise of digital immortality seems less important to me than it used to. By now I’m kind of okay with passing away. And, with or without high tech, I’ll be leaving some printed books behind and, even closer to my heart, my children and grandchildren. That oldschool wetware immortality…

Managing Music in iTunes

Tuesday, January 4th, 2011

I link to this page from a new post on February 18, 2014. And I revised this page here, as well.

This post goes with another post, Ripping Vinyl to MP3s for iTunes.


[This post is illustrated with a sequence of non-computer-related photos that I took around Los Gatos and Santa Cruz recently. It’s been raining a lot lately, and now the sun is out, and today it was like a cool spring day.]

Prolegomena

This year I made a simple New Year’s resolution. I’d finally rip my vinyl to digital files. I’ve got a few hundred favorite old LPs in my living room, and I want to hear them on my iPhone.

I’ve been embroiled in this for a couple of weeks, and I’m going to write (at least) two heavily geeky posts about it. This, the first post, “Managing Music in iTunes for Free,” is on the general topic of organizing your music in iTunes, mainly focusing on the Windows platform. And the second post, “Ripping Vinyl for Free” will be about the related process of copying vinyl records into iTunes for use on your music player.

Let me state in advance that I’m a Windows user, and I am not a huge fan of iTunes, in terms of its feature set, user interface, speed and responsiveness. Ever since March, 2010, I’d in fact been getting by with using the Windows Media Player (WMP) in addition to a commercial plug-in that let me synch a Windows machine with an iPod. In some ways WMP is a better tool than iTunes, but I’m not here to argue about that today. Nothing’s perfect. [This pops into my mind a remark by Randall Jarrell: “A novel is a prose narrative of some length that has something wrong with it.”]

In any case, my old setup wasn’t compatible with my new iPhone 4, also there are a number of other things (like apps) that you need to synch with iTunes onto your iPhone. So I’m back in iTunes. Oh well. I’ve been around this track a few times before. And iTunes does have a pretty interface, that album-flip thing is cute. And I have to use it with my iPhone. So I might as well learn how to do it right. So I can rip my vinyl.

Free Tools

Over the years, and more so in the last two weeks, I’ve learned a few tricks about managing your music in iTunes. This information is not all that easy to find online. When you look for it on Google, most of the top-page links are to sites promoting feeble, kludgy commercial software. I downloaded trial versions of a few of these, and didn’t like them. They were slow, not all that good at what they were supposed to do, and they wanted, like, $39 to keep working after 100 songs.

With a little digging, I’ve learned how to do everything I needed for free. So I thought I’d note some things here, if only so I can easily find the answers when I’ve forgotten them in a year or ten. I am not going to mention or plug any commercial software at all in my two posts. And for that matter, I plan to remove or block any mentions of commercial wares from the comments on these posts. Real info from the people and for the people.

I’ve found two key pieces of free software for the Windows platform. Note that when I say “free” I use the word in the quaint old sense of “not costing anything to get and working forever without obnoxiously begging you for money.”

Tool 1: A free iTunes plug-in for Windows called. iTsfv , an acronym that stands for “iTunes store file validator.” This is one of the best pieces of free software I’ve ever seen. I have better results when I download the 2009 version 5.61 from from Sourceforge than trying to use the 2011 version 6.** from Google Code…the new version lacks a real interface. Not sure why the development process stopped…maybe they decided it’s “done.” It’s great for cleaning up your file names and file metatags. The one-touch validation tool does a lot for you. A confusing thing is that iTsfv only works when iTunes is open in a separate window, and if you want to work on some “selected files,” you select them in the iTunes window and then go over to iTSfs to do whatever chagnes you want. Sadly iTsfv runs only on Windows. I don’t know if there’s any free software that’s comparable for the Mac—possibly , GimmieSomeTune. Finally it’s worth noting that simpler fixes can be done by hand in iTunes, you select the files whose tags you want to alter, right click and select Get Info to bring up a dialog where you can alter tags or, for that matter, paste in an album cover image. You can do this to a bunch of files at once as well.

Tool 2: A free tag editor .  I use Mp3tag, which is free, and for Windows. This software lets you look up the titles of the cuts of an album’s songs, and allows you to copy these names both to the metatag and to the file name. This editor is also pretty good at finding album art, although, as I’ll mention later, you can fix the album art pretty easily by hand using Google image search.

The iTunes Architecture

I find it useful to have a mental model of what’s going on inside my machines. I think of there as being four different kinds of information involving your music when you use iTunes.

(1) The directory structure of the audio files saved on your hard drive.

(2) The internal data base that iTunes builds. You can’t see the database directly, but you see it indirectly in terms of what’s displayed in your iTunes window.

(3) The “metadata” tags embedded in your audio files. These so-called ID3 tags hold info like the song title, the artist, and possibly an image of the album cover.

(4) The album art.

In the rest of this post, I’ll make some comments about each of these four areas.

(1) Music Directory

I’m suspicious of less-commonly used file standards like the AAC format—which generally isn’t playable on generic music players. So I use the more widespread MP3 format. A win with MP3 files is that you can find good freeware editors such as Mp3tag for tweaking their metadata fields—which we’ll get into later on.

Do note that the iPhone, iPad, and iPod play MP3 files just as well as they play audio files in the proprietary Apple AAC format. There is absolutely no downside to using MP3.

If you want to convert existing AAC files to MP3, you can often do this using iTunes, and in fact a few years ago I did that to a lot of my files. But, as Peeter points out in a comment, it’s not really a good idea to convert from one lossy format to another, as it degrades the sound quality somewhat. So you might just switch to importing future files as MP3, and plan to work with a mix of the two kinds of files.

You set the rip and import as MP3 choice on the Edit | Preferences | Import Settings. Set it to MP3, and for the Setting, choose Custom…, which opens a dialog. The kps number determines how many samples per second you make of the music stream. In the old days I used 128 kps, but now I pick 256 kps, and turn on Variable Bit rate (which saves a bit on file size by using less bits on the simple parts of the songs) and choose Medium High or High for the VBR. We’re edging towards terabyte memory storage, and we can be generous.

It’s not at all useful to have your music files hidden somewhere invisible inside My Computer’s Settings files. You want your music files in an easy-to-find location so you can look at them, copy them, and, if you’re of a tweakerish nature, edit the file structure by hand. I make, say, a C:\Music directory on my hard drive, although I can put the directory somewhere else, too. I tell iTunes about this on Edit | Preferences | Advanced | iTunes Media folder location, where I set the iTunes media folder to be me Music folder. iTunes will store a few other things in there, but that’s okay.

Still in the Edit | Preferences | Advanced dialog, I’ve decided that’s wise to remove the checkmarks on the option “Keep iTunes Media folder organized (Places files into album and artist folders, and names the files based on the…song title)” The reason I turn this off, is that, if the option is on, then, over time, iTunes will repeatedly tinker with and in some ways degrade your Music file directory structure.

Along the same lines, you should avoid the File | Library | Consolidate action, which is about the same as importing the whole Music folder with Keep iTunes Media folder organized turned on—it will change your directory and filenames and may split some directories into several pieces.

And never ever use the File | Organize Library | Reorganize files option, which will copy the contents of your Music folder to a Music\Music subfolder.

Backing up a bit, note that, even when the Keep iTunes Media folder organized option is off, iTunes will still do something useful when you use it to rip CDs. Whether or not the option is on, when you rip a CD like Joe Moon’s Howling, iTunes will store the MP3 tracks of the CD in a folder like Joe Moon\Howling that goes into the Music directory.

Normally, compilation albums, that is, albums with songs by a variety of people, are all stored in subfolders of a Compilations folder—although iTunes isn’t always reliable in doing this. Keeping only multiple-artist albums inside the Compilations folder is the kind of thing that ultimately you may need to do by hand. And if the “Keep iTunes Media folder organized” is off, then iTunes won’t slyly and robotically trash your work

If you’ve edited your Music folder by hand—perhaps adding some files yourself, or moving the entire directory—you need to tell iTunes to import it, so the information goes into the iTunes data base. This is simple. Use File | Import Folder to import the Folders that you’ve changed. Doing this is almost instantaneous. If you have not turned off the “Keep iTunes Media folder organized ,” the action of importing these files will a change the directories’ name and some of the filenames.

By way of undoing iTunes depredations on your Music directory, note that, given a chance, iTunes will mangle the name of some artists or titles, in particular the “&” and “/” symbols are often replaced bye “_”. You can correct these directory names by hand.

Occasionally, iTunes will split a single CD across several directories. You can copy all the files into a single directory and delete the extra ones. Keep in mind that every time you’ve edited your Music folder by hand, you need to tell iTunes to import the folder again.

Another way to match your iTunes database with your Music directory is to use the the iTsfv Synchroclean command, where iTsfv is the free software mentioned above. iTsfv is useful in other ways for cleaning up your file names and directories. It also has a feature for removing empty directories.

Once you get your files and directories into perfect shape, it’s wise to mark them read-only to prevent some rogue ware from trashing the file structures and the painfully perfected metadata. You can do this by right clicking on the Music directory, or by letting iTsfv do it.

As another cautionary measure, if you have plenty of room on your hard drive, make a separate directory called Music Backup and simply copy the full contents of your clean and tidy Music directory into there.

(2) Music database

As I said, you don’t directly see the iTunes database, but you see the effects of it in the display. There are two kinds of issues here. One kind of issue has to do with the database being in some way out of date. The other kind has to do with the “metadata” or ID3 tag information inside the music tracks. I’ll talk about the music metadata in section (3).

If you’ve tweaked your Music directory and re-imported it, is that some songs may appear twice in the iTunes database, but one of the entries will be a “dead track” that is, a link to a no-longer-existing directory location. Or if you hand-deleted a folder of songs, then all those references will now be “dead tracks” in iTunes.

These entries will sometimes have an exclamation point icon next to them on the left in the iTunes display. But the exclamation point tends not to appear until you try and do something with the track, so they’re not always easy to find. And deleting them by hand is a drag.

I found an easy, platform-neutral fix for finding and removing dead tracks by Paul Mayne. Scroll down in his post to the September 2009, update, where he explains how to do it with two playlists, one smart and one static.

Even easier, if you are using iTsfv, it’s Synchroclean command will automatically delete dead tracks, as well as synchronizing your folder with your iTunes database.

(3) Music metadata

This is one of the biggest time-sinks involved in managing your music files. Each audio track has some fields of non-music data to hold such things as the album name, the album artist’s name, the track name, the track artist’s name, and possibly a jpg image of the album cover. These are often called ID3 tags.

Generally you will already have some tag information in your audio files—unless you’ve ripped your file from vinyl, but I won’t get into that yet today. With tracks ripped form CDs or downloaded, you’ll normally have tag information. But you may need to adjust it.

iTunes itself lets you edit the tags, although, in some ways the free Windows tool Mp3tag is better. Within iTunes, you can highlight one more more tracks and press Ctrl + I in Windows (or Apple + I on a Mac) to open the Item Information dialog. Or you can use the File | Get Info… menu selection to open this dialog, which will look slighty different depending on whether you are editing the tags of only one file or of several files at once.

Okay, so what do we use the metadata tags for?

Sometimes you have orphan tracks that are listed as belonging to Unknown Album by Unknown Artist. You need to edit the metadata tags for these poor tracks and fill in the info. Where do you get the info? Often you will in fact know this information, or be able to deduce it from listening to the track. Or you can ask iTunes to find the track info, but often as not, it snottily refuses to do this, saying that you didn’t import this file via iTunes (meaning, I think, that you didn’t buy it from Apple). Easiest of all, for a Windows user, is to open the files in Mp3tag, which, given the album or artist name, can look up the track info in one of several online databases like MusicBrainz and discogs.

Besides orphan tracks, another common problem is that a single album is split into two or more separate albums in iTunes. I found the answer in the Apple Support forums, a well-moderated non-spammy spot to look. The secret is to make sure that all the tracks in question have the identical information regarding Album Artist and Album. It’s not enough to set the Artist field, you have to set Album artist as well.

Normally giving all the tracks the same Album and Album Artist tags immediately merges the two blocks of album listings together. If it doesn’t merge this usually means that the Compilation field is set to Yes in some files and No in the others, and your need to uniformize this.

A related problem is that a compilation album like O Brother Where Art Thou may end up listed within iTunes as if it’s a whole lot of different albums. In this case you need to tell iTunes that the tracks do belong to a compilation album. There is a setting for this in the Information Dialog that call up when you highlight some tracks with the Get Info command. Make sure that every track in a compilation album has Compilation set to Yes, and that the Album Artist field is either blank (in which case iTunes will supply the “Various Artists” name) or is, if you like, set to the name of the album’s compiler, as in Richard Scorsese’s Blue’s Collection.

In setting the tags, note that you are free to alter the names of your artists and albums. Artists sometimes use different names, and it can be useful to adopt one default spelling. Or you might want to just list a group by the name of the leader.

Another issue is that album names are often too long to view on your iPod, names like Zappa’s You Can’t Do That On Stage Anymore Volume 5 Disk 1. I like these albums, so I gave them all names like On Stage 5-1 and On Stage 5-2. While I was at it, what the hell, I changed the album names from On Stage 5-1 and On Stage 5-2 into a single “album” (as far as iTunes can perceive) name On Stage 5.

I do all this by changing the tags, you understand, it doesn’t necessarily have any direct connection to the directory names inside my Music folder.

(4) Album Art

I haven’t yet mentioned the missing piece of information that concerns us perhaps the most often: the album art. To begin with, you can ask iTunes to search for the album art. And it will do this provided you have a free iTunes store account. Running the search several times often produces slight improvements. But, at least for me, there’s usually about ten percent of the albums that don’t get covers, or that get the wrong covers. [You can also search for album art with Windows Media Player. Unfortunately the two programs don’t store the art in the same places or in the same kinds of ways.]

You can preview the presence of track art in iTunes by pressing the fourth button from the left on the bar at the bottom of the screen. This is the “show or hide item artwork” button. If you turn it on, when you highlight one or more tracks, you see a picture of the cover in the lower left corner of the screen…or a gray note. You can drag or paste missing artwork right to this box.

The free Windows tool iTsfv is good at finding the files with missing artwork, and looking for new artwork online. If anything, the one flaw of iTsfv is that it tends to find rather high resolution images for you, and sometimes you don’t want to use up quite that much disk space.

Another way to find the tracks with missing artwork is to use a Smart Playlist defined by a condition like “Art is Missing.”

There is a very easy way to fix the artwork yourself. Just do a Google Image search with the album artist and name in the search box. You’ll find hundreds of images of the cover. Pick a decent-looking one, but don’t go overboard in terms of size, about 400 or 500 pixels across is usually going to be enough. Copy the image from the Google search page—I use a right click and a Copy Image to do this, but you can do this other ways. The image is then on your (invisible to you) clipboard, and you can paste it in. Or you can drag the image.

Where do you paste or drag the image? To that preview box showing the highlighted tracks’ artwork in iTunes

It’s sometimes the case that the album cover image (or information about where to find the image) is attached as metadata to only the first track on the album. This suffices to make the album cover image appears in the iTunes browser next to the album’s tracks. But it may be that the image isn’t attached to the other tracks in a direct way.

Actually, in iTunes the situation is much more complicated that I’m saying. iTunes likes to hide the album art in a cryptic maze directory in your music file called Album Art, you can read a little about this here, although this post is a little too forgiving of this user-unfriendly iTunes behavior. Windows Media Player just saves the art in readily visible form (but with a weird names) in the album directories.

I’m still a little shaky in my understanding of all this. I found an interesting post by a person called Decipher discussing how to make iTunes store your art in your music folders.

My impression thus far is that when I copy my tracks to an iPod or an iPhone, however, the iTunes “maze of images” is often ignored by the viewer, and every track has to fend for itself in terms of providing an image of the cover of the album it came from. So often only the first track of the album will show a nice picture on the iPod or iPhone, and the other tracks will just show a gray note.

If you care about this, you can mare sure the album art is attached as metadata to each track.

If one track on an album has an image but the others don’t, you might highlight the image and copy it to your clipboard. Then highlight all of the no-artwork tracks from that album, and paste in your image from the clipboard.

Is there any cost to putting the album cover into every file as metadata? Yes, the file gets bigger. A typical album cover image of good quality is going to run you about 200 kilobytes. And you can look in your Music directory and see that the a given mp3 music file gets 200 kb larger after you add the album cover image to its metadata. Doing the math, if you have a library of, say a thousand tunes, then putting album art into each file makes your library 200,000 kilobytes larger, which is 200 megabytes, or just under a quarter of a gigabyte. In a nutshell, it costs a quarter gig per thousand files to put art in every file. If you’re loading up with four thousand files, the covers cost you a gig.

This isn’t a problem on my iPhone, which has 32 gigs of storage. But it is a problem for my 8 Gig iPod Nano. It’s a sneaky problem too. To keep the size down, I have a playlist called “Rudy’s iPod Nano,” and I only copy that to my Nano. But then iTunes might tell me that the playlist is 6 gig in size. But when I go and try and synch this playlist to my 8 gig Nano, the synch won’t work, because there’s not enough room. That’s because iTunes only told me the size of the audio part of the tracks. You used to be able to get around this by telling iTunes not to put album art on a given device, but I don’t see that option anymore. So for now, given that I do want the art on my iPhone, I just live with slightly fewer tracks on my Nano.

Not that, in reality, I often look at either music-player’s screen.

Up Next

One final tip. When you get the files in your Music directory nicely organized, and with good metatags in place, savea back-up copy of the full Music directory to another folder or to another drive. It’s really easy to lose a great deal of your hard work with an ill-considered click on tools as powerful as iTunes and iTsfv.

Okay next week or the week after, I’ll post about “Ripping Vinyl to iTunes for Free”.

Enough of this for today! Hope some of this is useful to some of you.


Rudy's Blog is powered by WordPress