This is the last of four 2012 blog posts on the topic of how to make your own ebooks, and which I revised somewhat in 2016. In 2012, I combined, expanded and revised these entries to make, fittingly, an ebook called How to Make An Ebook, available from Amazon. Note that this ebook is a 2012 edition, and it does not include any updates of the material that I made to these blog posts in 2016.
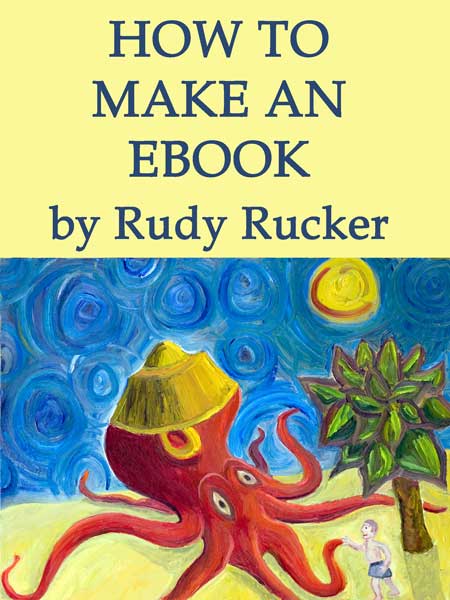
My How to Make An Ebook includes quite a bit of additional material, it’s more tightly organized, and it doesn’t include the perhaps too distracting photos that tend to clutter my blog posts! But it do
And now let’s get down to some Heavy Metal…I mean Heavy HTML.

Advanced Level: Dreamweaver & HTML
For full control, our workflow is to go from DOC or RTF to HTML, and then from HTML to EPUB. We’ll edit the HTML extensively. As I mentioned before, I myself use Dreamweaver, which is a commercial product from Adobe, but it’s possible that you could do a lot of this with some free HTML editor.
In all honesty, I should tell you that the process I’m about to describe is kind of complicated and probably not, in fact, a really good workflow to use. As I’ll mention at the end of this post, I now use a much simpler pro-level process. I import my books into InDesign and export my EPUB files from there. But before I learned how to use InDesign, I found the “Heavy HTML” workflow useful.
Converting DOC to HTML. Preliminary cleanup.
For full control, our workflow is to go from DOC or RTF to HTML, and then from HTML to EPUB.
In “Do-It-Yourself Ebooks #2. The Simpler Paths” I talked about ways to clean up your Word file before using it for an EPUB. But now there’s another thing you want to do. You want to stop using the Word Normal style, and get rid of as many other Word styles as you can.
The first thing you want to do about your Word styles is to ditch as many of htem as you can, as otherwise they’ll show up as extra crap at the top of your HTML. For this, go to Developer | Templates | Organizer, and look at the list of styles in your document in the left pane of the Organizer dialog. Most of them are styles you aren’t using in your document, and you ought to delete them. You can select them all by clicking at the top, holding down the shift key and scrolling down. Before pressing delete look over the list and see if there are any special styles you defined and that you love and don’t want to lose. Then press Delete. Word won’t actually delete the most essential styles like Normal, Heading 1, and a few others. But most of them go away. Note, by the way, that if you delete a style and it was in fact applied to some text in your document, the text stays in place, but its style reverts to Normal. If you do in fact erase some style that was doing something useful, you can redfine it.
An optional second step is make a new Style called, let’s say, epubtext. To do this, select a normal block of text, right click and select Styles | Save selection as a new Quick Style, and name the new style epubtext. Now use Find and Replace | More | Format | Styles to set the Find what box to be empty but with the Normal Style, and the Replace with box to be empty but with the epubtext style. You might also make up other special styles for things like epubextendedquote, or epubtextnoindent, and so on. If this seems to weird and complicated you can do it later over in the HTML file, replacing MsoNormal by epubtext in the class specifications on the p tags for starters.
There are two ways to turn your DOC into an HTML.
(MAKE THE HTML YOURSELF) Use File | New to make a new HTML document in Dreamweaver, specifying that the Doc Type be XHTML. And then I select my whole DOC, copy the text of the full book to the clipboard, and paste it into the the Design View. Before doing this, go to Edit | Preferences | Copy/Paste and (a) set your Edit>Paste radio-buttons to the last option, “Text with structure plus full formatting (bold, italic, styles)”. For sure you want to keep your italic and bold formats. And you want to bring along your DOC styles, although you will now need to edit them a bit in the HTML doc. Also check the “Retain line breaks” box, otherwise the file will come through as one single giant paragraph.
Okay, fine, but now when you go to paste your DOC into Dreamweaver it may object and says the file is too big. So you have to teach Dreamweaver a lesson. This link describes a way to alter the default size of a file that Dreamweaver is willing to accept. To use this trick, close Dreamweaver, go to find InsertOfficeDoc.js, open it in the Text Pad editor, and add zeroes to the ends of the WarnThreshold and MaxThreshold numbers. Then open Dreamweaver again, and it’ll let you paste in a big book-sized file. Save your newly made HTML or XHTML (either file extension is okay) file in the directory where you’re keeping your files for this book. Now start cleaning up the file.
Note that pasting text into the Code view instead of the Design view is much trickier, and isn’t recommented, as pasting into Code view is likely to strip away all your formatting, especially your vital italics and, for that matter, your paragraph breaks.
(USE WORD TO MAKE THE HTML) In Word, save the Word file of your book as a “Web Page, Filtered” or filtered HTML file. Filtered means there’s less Word crap in the file. And I open this file in Dreamweaver and use Commands | Clean Up Word HTML… to get rid of more Word crap. By the way, when you saved the “Filtered HTML” file, Word made a directory of extra files in my directory, but there’s actually nothing in that directory that matters, and you can delete it. Word will put a lot of extra crap into your HTML file itself, and you will probably want to run the Dreamweave Commands | Clean up Word HTML tool. To remove more Microsoft crap, do a search and replace and delete all the style attributes from your paragraph p tags. Word will have jammed a bunch of unnecessary style specifictions into that attribute, and all the style you need is going to be in your class=”epubtext” attribute.
So okay, at this point, whichever method you used, you’ve got an HTML file of your book. Now you’re going to edit this file so you can make a nice EPUB out of it.
Tip: Stick to the Code view as much as possible. Dreamweaver lags and reacts slowly if you use the Design or the Split view. Now and then you’ll want to see the WYSIWYG views, yes, but stick to Code view most of the time and the program runs much smoother. And, oh yeah, Dreamweaver also runs faster in Code view if you close the Properties window.
Now we need a few more tweaks so that the HTML can be used to build an EPUB.
* Fill in the Title field for your HTML in Dreamweaver.
*Delete the body attributes link and vlink if they’re present.
*Remove all the align attributes of the p tags
*Remove all the clear attributes of the br tags
*You will have some anchor tags that make your Word-built Table of contents and in-document links work. The EPUB standard likes the id attribute but not the name attribute, and either one works. If your anchors have both name and id attributes, remove all the name attributes. If your anchors have only the name attributes, change them to id attributes doing a search and replace to change every occurrence of <a name=somenumber to <a id=somenumber
*Look at your span tags. Many of them are doing much for you, they’ll be things like span style=“font-family:’Georgia’,’serif’; font-size:12.0pt; color:black; “. It’s pretty safe just to search for all span tags with a style attribute and remove the tags (but not the contents of the tags). If you want to style your text you’ll do it with a class attribute on your p tag or, if necessary, a class tag on a span tag.
And now you want to work on your styles some more, which deserves a separate subsection.

Styles
You will see some code like this in between the <head> and </head> tags at the top of your HTML file. The contents of the style definitions will be different, but you’ll see something like the following, which is called an “internal style sheet.” (We will soon switch to an “external style sheet”.)
<style type="text/css">
p.epubtext
{ text-align: justified;
text-indent: 1.5em;
margin-top: 0px;
margin-bottom: 0px;
font-family:"Georgia", serif; }
h1 {
text-align: left;
font-size: 1.5em;
font-weight: normal;
font-family:"Georgia", serif;
margin-bottom: 0.67em;
margin-top: 0.67em;
page-break-before: always;
}
</style>
As I mentioned above, you might have erased most of the Word file styles, but if you didn’t you’ll see a lot of them here as part of the inernal style sheet. You can simply delete most of these, although you can use a Search command to check if they’re being used in your document. Many of them have “Mso” at the start of their name. You can eleminate them from your HTML document now.
If you haven’t yet changed from the Word Normal style will be called MsoNormal in your HTML. Search and replace to change “MsoNormal” to “epubtext” everywhere.
At this point you can also the Commands | Clean Up Word HTML, but if you made your HTML by cutting and pasting rather than letting Word save as HTML, you don’t really need this tool.
By now you’ll see that most of your paragraphs start with the tag </p class=“epubtext”. And the chapter headers should have a tag like </h1 class=“epubh1″
When you converted the Word DOC to HTML, the Heading 1 styles automatically changed to h1. You can simply change the style of h1, as in the sample code above, or you can define an epubh1 style and apply that to the h1 tags as a class attribute.
At this point you really want to switch to an external style sheet.
To make an external style sheet, put a line like this into in between the <head> and </head> tags at the top of your HTML file.
<link href="../Styles/epubstyles.css" rel="stylesheet" type="text/css" />
And now make a new file called epubstyles.css in the Styles directory. Just a text file, you can ask Dreamweaver to make a new CSS file if you like, it might have a @namespace or info line at the top, but this doesn’t much matter. Here’s So fool with these in Sigil, flipping between your style.css pane and a pane showing your text, until you see what you like. Then Verify your epub file one more time and save it and it’s done. As an example, you can look at my file rudyebookstyles.css of the style definitions I like to use.
And now you put style definitions into the epubstyles.css file. The general rule is that styles start with a . in the style sheet, but you don’t use the . in the code.
Here’s a really good “cheatsheet” link about CSS.

HTML for EPUB and MOBI
There’s a lot of specialized things about tweaking HTML so it looks good on an ereader. I’ll just mention a couple of things here.
Never set margin-left to anything but 0. Otherwise you can, for obscure reasions, end up with an indent that shoves your text halfway across the reader screen.
If you want to set off your text, use blockquote, which is a really great HTML tag. It indents your text a little on the left and and right and skips a half-line or so before and after your block of text. You can put <p> tags inside a blockquote block. Some advise against this practice but it works well for me.
I like to format my extended-quote or blockquote text a little differently. I like to make the font a little smaller, and to use a left alignment with a ragged right edge instead of the default justified alignment that goes for even left and right edges. I have to put in the class=”epub_extended_quote” attribute by hand on the <p> tags inside my blockquote.
Here’s what I do in my epubstyle.CSS to define epub_extended_quote. I include four styles here, epubtext, epubtext_noindent, epub_extended_quote, and epub_centered. A nice thing in a CSS file is that you can get styles to share some attritube properies by listing them separated by commas in an initial group definition. And add modifications to the attributes in separate blocks. I’ll print some code here, and just for fun I’ll format with the <code> tag like I’ve been doing, and I’ll put it inside a <blockquote> tag as well, although I’ll leave the text style as epubtext for now.
.epubtext, .epubtext_noindent, .epub_extended_quote, .epub_centered {

display: block;

font-family: Georgia, Times, "Times New Roman", serif;

margin-bottom: 0;

margin-left: 0;

margin-right: 0;

margin-top: 0;

text-align: justify;

text-indent: 1.75em

}
.epubtext_noindent {
text-indent: 0in
}.epub_extended_quote {
text-align: left;
font-size:0.9em;
}.epub_centered {
text-align: center;
}
And here’s a paragraph inside a blockquote tag and with the text in epub_extended_quote style.
And that’s all I have for you right now. But I found out a lot about HTML for EPUB and MOBI from this great link.

Synching your EPUB with your HTML and CSS “Source Code”
You want to save your big big HTML file and your epubstyle.CSS as a kind of source code. Once you have your HTML in a reasonable state, you can open it in Sigil and it will drag the Images and the CSS along, making copies of them within the container EPUB file.
Sigil will not save a file as HTML or XHTML, so you have to use a trick to move your “source code” HTML file back and forth. When you have it open in a code window Sigil, you can use Ctrl+A to select all of the HTML file code contents, then Ctrl+C to copy it to the clipboard, then go over to Dreamweaver with your source code HTML open in a window there and then do a Ctrl+A to select the contents of the source code file and then to Ctrl+V to paste the clipboarded code from Sigil onto your Dreamweaver file. You can edit the file for awhile in Dreamweaver, then bring it back into Sigil by reversing the procedure. Select the whoel file in Dreamweaver, copy to clipbaord with Ctrl+C, go over to Sigil, select the whole main HTML code and use a Ctrl+V to overwrite it with the source code HTML from Dreamweaver.
By the same token you will have a source code epubstyle.CSS file and one that’s inside the EPUB file in Sigil, and you can edit this file either in Sigil or in Dreamweaver, making sure to use Ctrl+C and Ctrl+V to move it back and forth, keeping the EPUB in synch with your “source code” HTML and CSS.
You can either edit your file in Sigil, or you can copy the file back into Dreamweaver and edit it there. Editing a lot in Sigil is a little bit flaky. Two issues. As of the May, 2012, release of Sigil if you do a big Search and Replace in Sigil it sometimes crashes. Not all that often, but often enough to matter. It’s safer to do those big mass replace moves in Dreamweaver. Another flaw in Sigil is that it’s an imperfect WYSIWYG editor. Editing the code view window in Sigil is fine, but if you try and edit in the Book View window, you’ll get “turd-bit” characters in the code view after deleting characters in the book view. So: (a) always save your EPUB before doing a big Search and Replace in Sigil, (b) only edit in the Code View window of Sigil, and (c) if you want to do a whole lot of editing, copy your Sigil EPUB HTML or XHTML file over to your “source code” file in Dreamweaver.

Images
While you’re in HTML, look at the image links, and make sure they all point to file-names to the images subdirectory that you made. You may need to use the Edit | Find and Replace dialog to get things set.
You’ll have at least one image, your cover. It’s better not have the size of the images hardcoded. That way you’re free to force in larger images if you want. Use the Edit | Find and Replace dialog and for the Search: field select Specific Tag and set to img, then for the Action: field select Remove Attribute and set to width. Then do the same for height. Then do the same for border.
Regarding the images you want to include, even if you inserted them into your Word DOC from somewhere else on your hard drive, put copies of all the images that in a subdirectory of your project directory and name the subdirectory Images. Use some photo editing software to adjust the sizes of these images to be, let’s say, 700 pixels across so they can fill up an iPad reader page. This way you have control of what images get used. The thing to keep in balance is, on the one hand the size of your EPUB file and, on the other hand, the quality of your images. Maybe 600 pixels across is enough. A 700-pixel image uses forty-percent as much memory as a 600-pixel image. On the other hand, people don’t mind big files these days, so maybe 10 Megabytes instead of 6 Megabytes is okay.
One crucial thing to keep in mind. I mentioned it before but I need to say it again: DON’T let any width or height attributes sneak into your image tags, or the image may not resize well. Your tag should be clean and simple like.
<img src=“../Images/fabsnap.jpg”>
This assumes that you are using the directory structure I mentioned before, with three directories, HTML Text, Images, and Styles, with your source HTML in HTML Text, the jpg files in Images, and your CSS file in Styles.
Breaking up the HTML
I mentioned before that you ought to put hard page breaks into your DOC after each chapter. When you convert the DOC into an HTML web page, these page breaks will show up as a break or br tag like this
<br style="page-break-before:always;" />
What you want to do in the HTML file now is to replace these tags by “horizontal rule” or hr tags like this:
<hr class="sigilChapterBreak" />
Sigil can read these tags and convert them into Sigil chapter breaks for shattering your monolithic HTML file into small files. But postpone shattering in Sigil at the last minute, as you want to keep a single big HTML or XHTML file as your EPUB “source code”.
A hard page break in a Word file becomes the following code when you transform the DOC into an HTML
So you can do a search and replace, changing the Word-generated page break code with the Sigil “shatter here” code
<hr class="sigilChapterBreak" /> An alternate approach is the following: To make a separator, insert the symbol <hr /> where hr stands for horizontal rule and you get a nice looking line like below.
You can use an attributes to make the horizontal rule take up only some percent of the page, have it be centered or on the left or on the right.

Validate with EPUBcheck & Build MOBI.
Install the EPUBcheck ware on your computer, it probably ends up in Program Files\EPUBcheck. Make a sample subdirectory of the EPUBcheck directory and put a copy of your current EPUB file there. Suppose it’s called betterworlds.epub.
Then go to the Command Line interface for your computer, navigate into the directory where epubcheck lives, like to Program Files\EPUBcheck. Now run a command like this:
java -jar epubcheck-3.0b2.jar sample/betterworlds1.epub
Of course the letters and numbers after epubcheck depend on which version of the software you have. And the name of the epub file depends on what file you’re checking.
If all goes well, epubcheck will either print a “No Errors Found” message, or it will spew out a lot of error messages. You can scroll up and down to see them all. Most common causes of errors are (1) you forgot to build a table of contents using the Sigil Table of Contents window, or (2) you didn’t fill in the Name, Title and Language fields using Sigil Meta tool, or (3) the EPUB ware is confused because you gave your epub file a name with spaces in it. If you see an error you can’t understand, try copying into the Google search bar to see what other people say about it.
As before, do the fixes in Dreamweaver, save the fixed HTML, reload in Sigil, save off a fresh EPUB and try epubcheck again. Then save your perfect EPUB.
And now you can use Calibre to turn your EPUB into a MOBI, or use the Kindle Previewer, as I discussed in “The Simpler Paths.” When you use Calibre for a conversion of your EPUB file, be sure to put the contents of your CSS file into the Convert Books | Look and Feel | Extra CSS box so that Calibre keeps your styles. (Remove the very first line of the CSS file, but keep the style definitions).

Back to DOC
If you load a shattered EPUB into Calibre and save as HTMLZ you’ll get a kind of ZIP file that has a single merged HTML or XHTML file in it plus the images, and the CSS stylesheet The zip file has the extensions HTMLZ, which most unzippers don’t recognize. In Windows you can open it with a free program called 7-zip that you can find on the web.
Word won’t open an XHTML file, but it will open an HTML file that you can then save as a DOC or as a PDF. You can change an XHTML file to an HTML just by changing first line. Look at a pair of HTML and XHTML files to see what you need to change.
One reason you’d want to get Word to open you final EPUB text is that then you save it as…a DOC file whose appearance you can tweak so as to save the book as PDF and publish it in paper as well. I won’t get into the whole paper thing here, but for now, I’ll just say that from what I’m reading online, it seems Createspace (yeat another Amazon subsidiary, it’s a bit sad to say) let you sell print-on-demand paper books at the lowest price per book to you.
Pro Level: InDesign
In 2016, I’m exclusively using InDesign to build my ebooks. Reason is that I’m also making paperbacks of all my ebooks, which menas I need to use InDesign anyway, so as to get a goodlooking PDF image of the printed book. I send the PDF to Amazon’s subsidiary CreateSpace and also to Lightning or to IngramSpark. And InDesign has a very good EPUB export feature.
Learning to use InDesign was a long process with many, many gotchas. And getting the EPUB export to work right took awhile too. I’ve made a lot of notes on this process, and I’ve posted a roughly edited version of these notes online as “Using InDesign for Print and Ebooks.”
Go for it! Self-publish your ass off! And let a thousand flowers bloom.







May 11th, 2012 at 2:08 am
Thanks a lot for offering it for free!
May 13th, 2012 at 11:52 am
Yes, thank you indeed! The timing is great for me. I paid a guy (a “pro”) to convert my first novel to mobi and epub because my book had complicated formatting, drawings, etc. I had help from a friend to make a second eBook. This next one I want to do on my own and not publish trade paper, just go eBook for Kindle, iBook and Nook. Those are the main sales, that I see. In general sales are better, I think, on eBooks now, unless you have a “big house” or major promotional help. I will keep buying your eBooks, Rudy (as I did your paperbacks before.) I’m thrilled to have found your site. Thank you so much!!
May 15th, 2012 at 7:30 pm
Here’s a site with very good and deep epub formatting info
http://www.paulsalvette.com/p/ebook-formatting-tutorial.html
October 1st, 2012 at 10:59 pm
Thanks Rudy,
Just read through all 4 posts and found them very useful.
I am quite comfortable using HTML (from playing with wordpress) so I am hoping that I don’t find it too difficult to follow once I get to that stage.
However, got to finish the manuscript first 🙂
Thanks again,
Ian